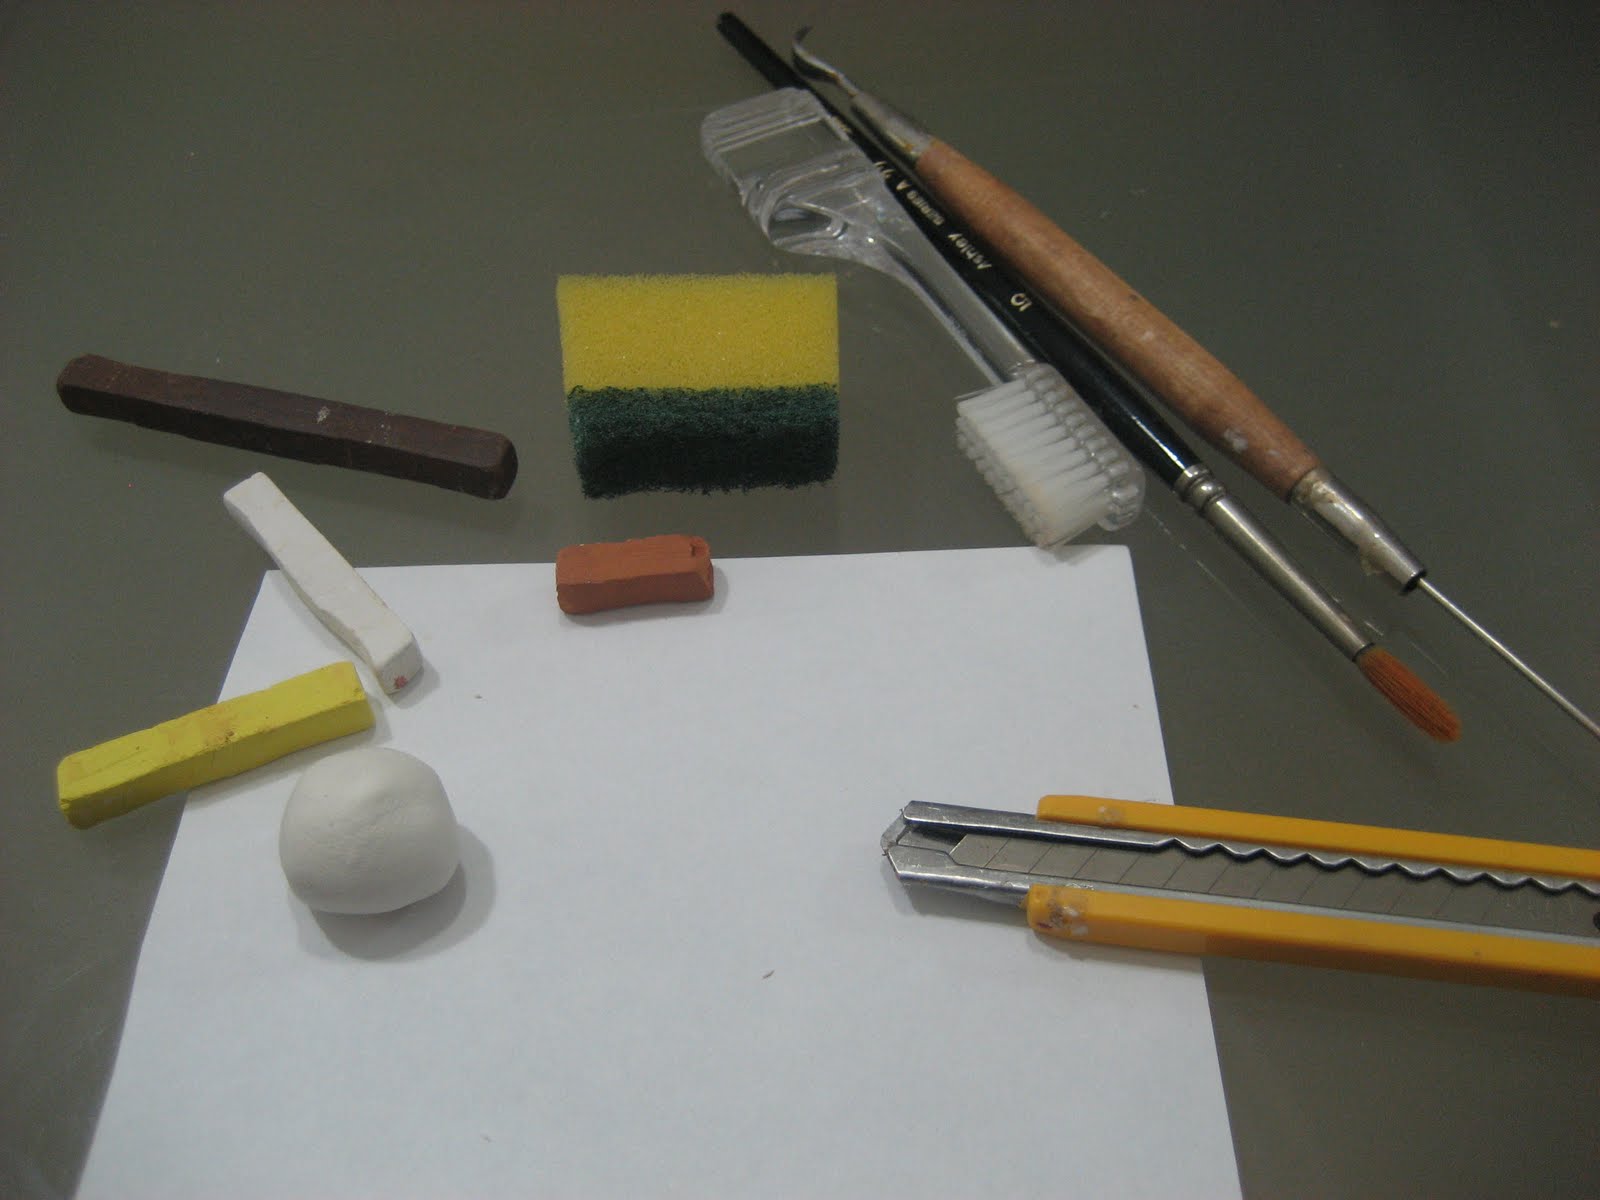

Here are the tools you will probably need: yellow, white, light brown and dark brown chalk pastles, an old toothbrush, a sponge with a "scratchy" side, a brush, a needle tool and a penknife/blade/craft knife, and a piece of paper
Knead some translucent clay and white clay together in a ratio of about 1:2
 Shape the clay into a squarish log shape.


Texture the bread on all sides using your toothbrush,

Enhance the texture using the "scratchy" side of the sponge.

Start to brush on the colours to give the bread a baked effect. Start with the lightest colour but be careful not to apply too much yellow.

You may also add a tinge at the corners :)


Then, cover it and pop it in the freezer for about 10 minutes. Then, using your knife, cut about two slices out of the loaf. Do not use a sawing motion to cut as "jaggs" will appear on the bread.


Texture the white portions of the bread.

Then, use a needle tool to make air holes of varied sizes on the white portions of the bread.

Add some finishing touches to your loaf of bread.

There you have it! A little loaf of bread :D

No comments:
Post a Comment